Saturday, November 8, 2014

Fast & Easy Pumpkin Praline Fudge


This a great recipe that is perfect for fall when you are cooking for a crowd and don't have a lot of pans and oven space. This naturally gluten free treat is the perfect blend of sweetness and pumpkin spice and is a yummy addition to have on hand for your guests. For me it taste like dulce de leche meets pumpkin pie but without being overly rich. Give it a try and let me know what you think!


For caramel:

2 T butter
1/2 cup brown sugar
1/4 cup corn syrup
1/3 cup sweetened condensed milk
1/2 teaspoon vanilla
1/2 cup pecan pieces

Place butter, brown sugar & corn syrup in a microwave safe bowl. Heat in microwave for 2 mins. Stir and add sweetened condensed milk. Microwave 1 min (watching to make sure it doesn't bubble over.) Stir again. Depending on consistency you may need to microwave 1 more min. Add vanilla, stir, add pecan pieces and combine. Set aside.


For fudge:
1 package Pumpkin Spice Hershey Kisses
1 package white chocolate chips or white candy melt
1 can sweetened condensed milk
1 teaspoon vanilla


Line an 8x8 Pyrex dish with foil and grease with butter, set aside.
Combine unwrapped kisses, white chocolate chips and sweetened condensed milk in a microwave safe bowl. Heat for 1 min and then stir. Heat in 30 second increments (stirring  in between) until it is smooth. Stir in vanilla. Pour fudge into lined Pyrex dish. Place spoonfuls of caramel mixture all over fudge. Stir in to swirl carmel with fudge mixture. Let sit to cool and set up.

-Natalee


Monday, October 13, 2014

Gluten Free Sloppy Joes


This recipe is a family favorite. We eat it every Halloween and this year tried using the Creamy Chicken Orzo pictured below and boy did it kick it up a notch. Holy Yum! This is a perfect for a windy fall night and has a certain degree of comfort food factor with out breaking the bank calorie wise.

Ingredients
1 tablespoon olive oil
1 medium yellow onion diced
2 pounds ground beef 
1/2 cup brown sugar
1 teaspoon Dijon mustard
2-4 tablespoons Worcestershire sauce
1 cup ketchup
1 can of GF Creamy Chicken Orzo Soup
Directions
Start the recipe by bringing the GF Creamy Chicken Orzo Soup to a boil in a sauce pan. Allow soup to reduce by about 30%. Once it has reduced, either place soup in a blender and pulse or use an immersion blender directly in the pan. Then set aside. 
Heat a large skillet over medium high heat. Add oil and then diced onion. Once onion starts to brown add meat. Spread the meat around the pan and begin to break it up.  When meat has browned add brown sugar, mustard, ketchup & Worcestershire sauce to the skillet and combine. Reduce heat to medium add GF soup and let simmer for 7-10 mins or until thickened.
Serve with your favorite GF buns and Bread & Butter pickles.

-Natalee

Sunday, August 10, 2014

Super Fast Amazing Weeknight Pasta (that your kids will also love!)

One of my favorite products is Tolerant brand Red Lentil Pasta. It is naturally gluten free, high protein, very filling and tastes amazing. I highly recommend you check it out.


2 T. butter
2 cups whole milk
1 cup of Italian blend shredded cheese
1 T olive oil
1-2 garlic cloves minced
Red bell pepper cut in thin match sticks
Pepper to taste
1 box Tolerant brand Red Lentil Pasta

Heat olive oil on medium heat in a sauce pan. Add red bell peppers, cook until they start to soften.
In a small stock pot start boiling water for the pasta.  Prepare lentil pasta according to package directions.
In the sauce pan after the red bell peppers have softened add butter and minced garlic. Stir for 1-2 mins, then add milk and pepper. Continue to stir for 3-5 mins. Add cheese and stir until smooth.  Serve sauce with the red lentil pasta. Enjoy!

Wednesday, February 20, 2013

Swiss Butter Lettuce Salad


This is one of those recipes that I crave as the weather is starting to get warmer. It is a tell tale sign that my body believes that Spring is here. My sweaters go back into the closet, I start running outdoors again, and this salad starts making a regular appearance. You will need:

2 large heads of butter lettuce
1 10 ounce bag of fresh spinach
1 can of artichoke hearts, drained
1/4 red onion chopped
2 roma tomato chopped
1 cup of sliced mushrooms
3/4 cup of fresh grated Swiss cheese
1/2 pound bacon, cooked and cut into 1 inch pieces
1 cup drained cottage cheese,

Dressing:
3/4 cup of sugar
1 Tbs brown or Dijon Mustard
1 tsp sea salt
1/2 cup apple cider vinegar
1 1/2 cups of the oil of your choice (I like olive but it does make your dressing a little more dense)

Start by tearing your butter lettuce and spinach and placing it in a large salad bowl. Never chop your leafy greens with a knife as the sharpness perforates the cells and they basically go limp and wilty. We are going for a fresh crisp salad here. Now add the remaining salad ingredients on top and cover until you are ready to serve. For the dressing combine all ingredients into your blender and let your blender run for about 30 seconds to emulsify everything together.  Don't you just love homemade dressings? I do. They are so much fresher tasting and preservative free plus you have the ability to play with it and add less or more of those ingredients you love. Once you are ready to serve the salad, pour the dressing on and toss everything together. I'm sure you will love this gem of a salad as much as I do!

Friday, January 25, 2013

Pistachio Cranberry Goat Cheese Roll


This is a yummy and extremely easy 4 ingredient appetizer or hor dourve that always seems to impress. It takes all of five minutes to throw together and the flavors are very complimentary together. I often make this for New Years Eve, the super bowl, girls night, and various baby or wedding showers. You will need:

1 goat cheese log (I used a 10 ounce, any size will do, there is also often enough to do a second roll)
1 cup of shelled pistachios
1 cup of dried cranberries
honey

First crush the pistachios into pieces about the size of peas. Then put the craisins on a cutting board and chop thoroughly into very little pieces. Mix the cranberries and pistachios on a dinner plate and roll the goat cheese log into the nut mixture pressing down lightly until the goat cheese roll is covered. If your are not serving this right away, you can cover with plastic wrap and refrigerate at this point. If you are ready to serve place on desired serving plate and drizzle a fair amount of honey over the top of the roll. Serve with crackers and Enjoy!

Tuesday, January 1, 2013

Thomas Family Minestrone

Okay so this recipe is a game changer, nay a life changer. Get ready for the transformation that is about to be. This recipe has until this day, been a secret family recipe that has been perfected by my brother Jeremy and has been turned gluten free by yours truly. It has adorned our kitchen table nearly every single Christmas day for our traditional big italian Christmas dinner. I have hesitated to post this recipe due to the special significance it holds in our family. This is the first time it has ever graced the internet (not even in an email) and somehow I feel like a traitor but to keep up with technology and to preserve this recipe for future generations, I'm going to post it. Family please forgive me.

Here is what you need. Understand that this is for a larger party size that you share with friends and family. But you are only a family of four? Have no fear, it freezes very well and you will love the leftovers so there may be nothing left to freeze. You can always halve this recipe if needs be too. This meal is notorious for being one of those recipes that is Oh-So-Much better the next day after flavors have melded. Seriously please don't even taste in until after a day. Anyways, you will need:


2 cans garbonzo beans
2 cans kidney beans
2 cans kernel corn
1 large can italian stewed tomatoes

1 small can of crushed tomatoes or petite diced tomatoes
12-16 cups Beef Stock (make sure the brand you choose contains no modified food starch/ gluten, I prefer Kitchen Basics. Please note that although most Better than Bullion varieties are safe, Beef is NOT gluten free)
4-5 small zucchini
1/2 head of green cabbage
1 extra large white onion

2 large handfuls of green beans snapped into  1-2 inch peices (optional and only if in season but do not used canned)
1 lb gluten free corn spaghetti pasta (broken into 1 inch pieces)
2 cups shredded fresh parmesean reggiano cheese
1 lb ground turkey
1 lb ground fresh italian sausage (ask the butcher to make sure it is GF)
2 eggs
1 can italian bread crumbs approximately 2-3 cups ( Use gf bread crumbs and mix with Italian spices until fragrant or make you own with gf croutons in your Blendtech or food processor)
Crushed red pepper
6-8 cups DRY red wine

3 Cloves Garlic
1-2 cups Worcestershire sauce (gf)
1 TB dried Oregano

Nutmeg 
Cinnamon
Pepper
Garlic Salt


I know, I know I'm using very broad measurements here. Unfortunately this recipe works that way. Start small then add more and more as it cooks down.
To start add all fresh veggies (reserving 1/4 of the white onion for later) and cans to a very large stock pot. Be sure to add in the liquid from the cans from everything but the kidney beans which you can rinse. Add in 1 cup of gluten free Worcestershire Sauce (at the time this was posted Lea & Perrins is gluten free and French's is NOT), Add 4 cups of dry red wine (my rule of thumb is the cheaper the wine, the better it is for cooking. I like to use a Cabernet Sauvignon for this recipe), and 8 cups of beef stock and bring to a boil. While the pot is starting to boil add in your dried oregano, and a 3-4 dashes of cinnamon, nutmeg, and dried red pepper. Let this concoction simmer at a shallow boil for up to two hours. As it starts to boil down a bit add the remaining liquid as needed up and in even ratios up to 4 cups of dry red wine, 8 cups of beef stock, and 1 cup worcestershire sauce to taste.


While your stockpot is boiling you are going to start making the meatballs. In a large bowl combine with your hands the italian sausage, ground turkey, breadcrumbs, 1 tablespoon of worcestershire sauce, and a few dashes each of garlic salt, pepper, nutmeg, and cinnamon, 1/4 grated onion. Now add another dash or two extra of cinnamon and nutmeg. Do not make these with out the nutmeg and cinnamon. Believe it or not, those two spices in the meatballs, make the soup. It is absolutely not the same without those spices. Add in one egg and check the consistency. If it sticks together very well and you can form small meatballs that stay together keep there form stop here. Otherwise add in one more egg. Form small meatballs between the size of a quarter and a half dollar. Once all meatballs are formed, slowly drop in the meat balls to the boiling soup mixture and continue cooking for a half hour. Once they have been in for a half hour take out a meatball and cut in half to ensure they are cooked throughout. If you are going to serve this soup tomorrow, turn off the heat and cool slightly before refrigerating, adding the spaghetti when you are warming the soup the next day. If you are going to serve this recipe today add in your spaghetti that is cut into 1-2 inch pieces and continue cooking for another 10 minutes before removing from heat to allow a little time to rest before serving. Again I strongly suggest cooking this a day in advance so that the flavor melds properly. Serve with a generous sprinkling of Parmesan Reggiano cheese on each bowl. From my family to yours, Enjoy!


Monday, December 10, 2012

Pomegranate Salsa

 It's December which means... It's Pomegranate Season! My dad has a few pomegranate trees at his home in Southern Utah and usually brings my sister in law and me a nice variety of Granada and Utah Sweet poms when he visits. One of my favorite fresh treats to make with our excess of lovely luscious fruit is pomegranate salsa. You will need:

1 large red pomegranate
2 large avocados diced
2 roma tomatoes diced
1/4 red onion diced
1 large lime
sea salt

First open your pomegranate and pop the arils out. That is the red seed part of the fruit. If you have trouble opening pomegranates please see my easy instructions below. Place the pomegranate arils into a medium size bowl,  add the avocado, tomatoes, and red onion.  Cut the lime in half and place in the microwave for 15-20 seconds. This allows the lime to warm up a bit and be as juicy as possible. Now squeeze both halves completely over the salsa mixture and salt to taste (a little more salt than you might anticipate). Serve with tortilla chips. Easy Peasy!


How to Easily Open a Pomegranate ~Gluten Free Madness Style:

Start by cutting off a little less than an inch off the top and bottom. Yes this will cut into a few of the arils but it the end the sacrifice of a few, blesses the many. Then score into the skin of at least one of the sections. At this point fill up a larger bowl of water and break apart the sections of the fruit under the water. At this point the larger sections of skin will float to the top. Continue loosening the arils in the water. Take out the floating skin and membrane and drain the water to reveal a bowl of perfect arils. There you go!


Monday, November 19, 2012

Gluten Free Funeral Potatoes (aka the best potatoes you have ever eaten)

I grew up on funeral potatoes and to me they are the ultimate comfort food. In our house we eat these with any pot roast, turkey, or special sunday dinner. My mom swears to this day, she was the first one ever to coin the term 'Funeral Potatoes' in the early 80's. She claims to have witnesses, you know who you are :) Either way I am certainly glad to have grown up with them. One of the main ingredients in traditional funeral potatoes is condensed cream of chicken and or cream of mushroom soup (Yuck). Well since the allergy is now present in our home, those cream soups are not. Years ago I tried making them with the gf canned cream soups but the recipes were always off due to the soup not being condensed and they also had a gnarly aftertaste. So after many special meals of trial and error my mom and I have come up with recipe that our family likes even better than the traditional gluten filled recipe. You will need:

32 ounce package of frozen shredded hash browns
2 cups canned milk
4 Tbs of cornstarch
1 Tbs of chicken better than bullion
1 tsp of sea salt
1/2 cup chopped onion (my husband likes me to add just a little fresh red bell pepper as well)
1 cup of sour cream
2 cups grated cheddar cheese (I personally believe the sharper the better)
1 package of cream cheese
1 1/2 cups of crushed kettle potato chips

In a small saucepan mix your canned milk and cornstarch with a whisk. After combining, add the chicken better than bullion, salt, and onion. Bring to a boil but be sure to stir constantly as to not scorch the milk mixture. Remove the sauce from the heat and stir in sour cream, cream cheese, and 1 cup of cheddar cheese.  Preheat your oven to 375 degrees. Pour your hash browns and cheesy mixture into a large bowl to coat. Stir until combined well. Pour into a 9x13 pyrex like baking dish. Top with remaining cheddar cheese and crushed potato chips. Cover with aluminum foil and bake at 375 F for 1 hour. Serve! Your taste buds will thank me :)


Thursday, November 1, 2012

Hearty Harvest Marinara Sauce

I preface this recipe by saying this sauce is a very big deal around here. It will make a mess and it will take several hours. However it has an amazing flavor and it's a great recipe to have in the freezer to pull out before work or life in the morning when you know you are going to have a busy filled day. It also seems to make the Winter go quicker and you still feel like you have some vine ripened magic happening in your snowy backyard. If you have children, they will be none the wiser that they are eating something healthy as the sauce is smooth because the veggies are pureed. This recipe makes between 12-18 quarts depending on the size of your tomatoes and how long you let it simmer down. To all those of you who want something to do with all the tomatoes, peppers and zucchini's from your garden at harvest time, here you go! I myself got all my veggies and fresh herbs at one of the larger local farmers market all for about $25. You will need:

40-50 garden fresh tomatoes
2 - 8 oz. package mushrooms 
1 large fresh garlic bulb
1/3 cup kosher or sea salt (or more depending on taste)
1 Tablespoon pepper
2 tsp red pepper flakes, optional 
8-10 large unpeeled carrots 
1 bunch celery
4 medium white onions 
1 large zuchini
1 large yellow squash
3 Tablespoons olive oil
5 Tablespoons fresh basil - save for very end!
2 Tablespoons sugar
4 cans tomato paste for thickening
I also added 1 tsp. dried oregano
1 tsp. dried parsley
1 tsp. dried thyme 
1 tsp. dried rosemary
All veggies and spices and their quantities are optional. Use however much of whatever you have! You will also need two large pots, a powerful blender (I used a Blentec) and several ziplock quart and gallon size freezer bags. I filled the quart sized bags for when I knew there would only be 2-3 of us enjoying a meal or for a pizza, and the gallon sized bags for when we are entertaining a larger group or wanted leftovers.

Use a food processor or blender to puree all the veggies, onions and garlic except the tomatoes which yes I know are technically a fruit -save these for later. This will most likely take several blenders full. I gave the washed veggies a rough chop, then put them in the blender with one to three tomatoes at the bottom (The less tomatoes the better at this point as you are going to sauté the veggies after this) The tomatoes at the bottom usually gave the blender just enough liquid to chop the rest of it. For a meatier sauce, don't puree your veggies, just chop them finely.
Once the veggies are all pureed, put them into a pot with the olive oil and let them sauté over medium to medium high heat for about 15 minutes. Add all the seasonings. Then equally separate the pureed veggies into two pots. To start your tomatoes, I would wash them, cut out their belly-buttons and cut them in half. Fill the blender and puree.  Also start adding a little of the tomato paste to your blenders full of tomatoes so that it mixes in well. If you don't do this and add it directly to the stock pot, it will clump and eventually scorchAgain, pour equal amounts of tomato puree into each pot. Stir well and allow sauce to simmer for 2-4 hours on low without the lid, stirring at least once every 10-20 minutes. I say this because one time I was making this and I left it for about 45 minutes without stirring to come back to stuck on the bottom scorched nastiness that left that stock pot of sauce ruined. Sauce should reduce about one third. Add the fresh basil right before serving or freezing. Taste the sauce to make sure it doesn't need any more salt/sugar/seasoning. (If you are using fresh tomatoes, you may need more salt/sugar to balance the acid.) Let sauce cool then freeze in bags/tupperware for later meals.
You can also add up to 4 pounds of ground turkey or italian sausage, which I didn't. By all means, you can add it, or any other ground meat to your sauce. I figure it takes about 3 minutes to brown ground beef/turkey/sausage, and sometimes, I just prefer no meat (like if I am using the sauce for pizza or calzone). The best part? It tastes awesome!  Enjoy!

Wednesday, October 10, 2012

Pumpkin Chocolate Chip Cookies (Gluten Free)


Ingredients:
½ cup butter
1 cup white sugar
½ cup packed brown sugar
2 eggs, slightly beaten
1 cup pumpkin
2 teaspoons gluten-free vanilla
1 ½ cups white rice flour
3/4 cup tapioca starch
1 ¼ teaspoon xanthan gum
3 teaspoons gluten-free baking powder
1 teaspoon baking soda
2 teaspoons cinnamon
½ teaspoon nutmeg
½ teaspoon ginger
½ teaspoon salt 
1 cup gluten-free chocolate chips

Directions:
In large mixing bowl beat together butter and sugars; add eggs, pumpkin and vanilla. Mix until well blended. Add small splash of milk if too dry

In medium mixing bowl combine dry ingredients and add to creamed mixture. Stir in chocolate chips. Drop by spoonfuls onto a greased cookie sheet. Bake at 350F degrees for 10-12 minutes.


Tuesday, September 25, 2012

Petite Heirloom Tomatoes, Caprese Style with a Twist


Here in Utah we have a few big farmers markets that are well known and decently expensive but we also have a few diamond in the rough farmers markets hidden in the small suburbs or towns . Well the neighborhood where I grew up started a farmers market this past year, only in the fall and I love it. I got a nice basket of baby heirloom tomatoes for three bucks, fresh basil for a dollar, and some other great finds. After eating many of the baby heirloom tomatoes like candy I decided that I would get some fresh mozzarella and that we would do a caprese salad but at our house instead of olive oil we use balsamic and some times give a gently squeeze of a lemon on top as well. So very simply you will need:

petite heirloom tomatoes (the best kind of all :)
fresh mozzarella sliced
washed basil
sea salt
fresh ground pepper
balsamic vinegar
a small lemon half (optional)

Basically wash the tomatoes and basil, slice the mozzarella, and the cheese basil, then tomatoes on top. Finish with a gentle squeeze of lemon if you like the flavor of citrus and then drizzle balsamic vinegar and dust with salt and pepper. Simple, easy, clean snack or appetizer that screams summer is at an end and the harvest is upon us. Enjoy!


Wednesday, July 4, 2012

Twice 'Baked' Corn on the Cob

In the summer we like to barbecue with my siblings. It's relatively fast, you keep the heat outside, and the food is always great. One thing that finds it's way to all of our family BBQ's is twice baked corn on the cob. It's another relatively simple recipe but when friends taste this corn their reaction is always the same. Their eyes get big, you hear a big Mmmm, and they look down at the corn wondering what you did to make it so tasty.


All you need is:

6-8  very fresh corn still in their husks (I prefer the salt and pepper variety of corn)
1/2 cup of fresh squeezed lime juice (approximately 3 regular sized limes)
1/2 cup of olive oil
salt and pepper to taste

That's it! Shuck the corn, boil it in water for 10 minutes, while the corn is boiling mix together the olive oil and fresh lime juice, sometimes its easiest to do this in the blender so it emulsifies well. You can more easily extract the lime juice by cutting the lime in half and putting them in the microwave cut side up for 15-20 seconds until almost warm before you try to squeeze them. Then using a pastry brush baste and bath the boiled corn cobs in the lime mixture before throwing it on a medium heat grill. Rotate corn every few minutes until grill lines appear all the way around the cob. You can continue to baste it as it grills. Yes, these babies are eaten how they come off the grill. No need to add butter, the lime and olive oil does the trick and gives it a unique delicious flavor. Salt and pepper to your liking. This corn will melt in your mouth. Enjoy!

Friday, June 22, 2012

Gluten Free Banana Bread & Muffins


You will need

1 1/2 cups of Gluten-Free All Purpose Baking Flour (or 1 cup white rice flour,1/2 cup bean or sorghum flour)
1 cup sugar 
1 Stick (1/2 cup) unsalted butter, room temperature 
2 large eggs 
3 ripe bananas*, peeled 
1 1/2 tbsp. milk 
1 tsp. ground cinnamon 
1 tsp. gluten-free vanilla extract 
1 tsp.  baking powder 
1 tsp. baking soda 
1 tsp. salt
1/2 tsp. xanthan gum 
1/2 cup chopped pecans

1 cup milk chocolate chips

Mix sugar and butter with mixer until creamed and fluffy. Mix in eggs one at a time. In a separate bowl, mash the bananas with a fork or potato masher, and stir in milk, cinnamon, and vanilla. Add banana mixture to cream mixture and stir with mixer. Combine remaining dry ingredients. Slowly stir into wet mixture until flour disappears.

For muffins, spoon mixture into greased muffin tins, filling each muffin hole 2/3 full with dough. Bake on middle rack of oven at 350° for 12-15 minutes, or until the muffin tops are golden brown (took me 20 minutes.) For a loaf, pour mixture into a greased bread loaf pan. Bake on middle rack of oven at 350° for 50-60 minutes, or until the edges and top are golden brown. * Note that ripe bananas don’t mean spoiled bananas. If you wouldn’t consider eating it, don’t consider putting it in your bread! Also, if you have ripe bananas but aren’t ready to make your bread today, peel the banana and place it in a ziplock bag in the freezer. They’ll usually stay okay in the freezer for 3-6 months if tightly sealed. When you are ready to use them, just take the bananas out of the freezer and let them thaw for a couple hours at room temperature.

Enjoy!

Thursday, May 31, 2012

Three Cheese Hashbrown Quiche

This is a great dish when you are serving breakfast or brunch to a crowd. We have made it a few times for my husbands coworkers when he is in charge of friday breakfast for his team. This is an easy and yummy recipe that I think you will really enjoy. You will need:

5 cups, shredded frozen hash browns, thawed and drained
1/2 stick butter, melted
6 large eggs, beaten
1 cup  cream, half-and-half, or milk
6 oz package of softened cream cheese
1 cup diced cooked ham (or bacon)
1/4 cup thinly chopped green onions for filling
1/2 small yellow onion for crust shredded
1 cup mushrooms chopped
1-2 cups sharp shredded Cheddar cheese
1-2 cups Monterey Jack cheese
1/4 tsp nutmeg
1/4 tsp mustard
1 tsp sugar
1 tsp baking powder
1 teaspoon sea salt
1 dash of freshly ground black pepper

First preheat your oven to 450 degrees F.  Gently press the drained hash browns between paper towels to dry them as best as possible. I even like to roll them up like a newspaper in a spiral style while firmly pressing down. You can also use a ricer to try to get out some of the liquid. In a 13x9 pyrex pan that has been sprayed with non stick cooking spray, toss the hash browns with the melted butter (and white onion optional) into the pan. Press them firmly into the bottom and up the sides to form a crust. Bake at 450 for 25 to 30 minutes until golden brown and starting to crisp.

Meanwhile, in a large mixing bowl, blend together cream cheese and eggs until well mixed. Its best to start beating the cream cheese and add one egg at a time. Add in the remaining ingredients. When the hash brown crust is ready pour the egg mixture over it and return to the oven. Lower the oven temperature to 350 degrees F and bake for about 30 minutes until the quiche is light golden brown on top and puffed. Enjoy!

Sunday, April 1, 2012

Food Blog Forum Orlando 2012


Oh the food blog forum. Where do I begin? First let me say that this was my first time attending any food conference of any kind and I wasn't sure what to expect but I was blown away. After hearing the first presentation by White on Rice Couple, Diane Cu & Todd Porter, I could have walked away feeling absolutely content. I immediately had an overwhelming feeling that I tried to write down while sitting in the middle of Epcot, applauding and crying. It felt like home. I've had a tumultuous past few years and for the first time in a long time, I felt like I had found home again, sitting with these people. Now I'm sure these emotions were forwarded by Dianes advice on never deleting your work because it's imperfect. She showed us the first video she ever took and edited on her iPhone. It was of their two beautiful dogs. She explained that she was just messing around with iMovie trying to figure out how it worked and made this little movie but that because it was simply imperfect, she nearly deleted it several times but was so glad that she hadn't because shortly there after their sweet dog died and they would have never had the footage of their beloved family member. Yes, my dog is my child so it especially hit home with me. But I have never heard so many sniffles in one room and seen so many people drying their eyes. They gave extremely valuable information that I will work all year long to implement into my attitude, my blog, and my pictures to which I am forever grateful to them. Please check out these people who have impacted me so here or here.

Again let me say that I feel so nourished. When I applied to be apart of FBF, I thought it was odd that it was only a one day session. I used to travel a lot for my old job and I would go to these horribly long conferences and trade shows that sometimes lasted five full days, often 12 hour days. And because I didn't love what I use to do, those days often left me feeling tired, cranky, and numb. Well I quickly learned that at FBF you learn much and they are so concise and to the point that you only need one day of info to blow your mind. And bonus- I loved every minute of it. I truthfully have so much to do to improve my website and myself that I will be applying these lessons and principles all year long and hope that I will again be invited to participate in next years Food Blog Forum. If there was an award for being the most improved, that would be what I am seeking as I know and proudly say that my blog at this time is incredibly amateur but that soon it will grow into something powerful and great.

I think I could go on for pages and pages, hours and hours telling you all about everything but I think I will let my pictures (and all of my links) do most of the speaking for me and then I will say a few more things to wrap it all up at the end. And heads up, they are all from my iPhone, I know. Oh, and there are a lot of them. Anyways enjoy!

Picturesque Setting


Welcome reception at the Grand Floridian, the presentation was incredible. A salad chandelier, an ingenious gourmet mac & cheese bar, savory ice cream cone hors d'oeuvres, and a delectable dessert bar.


The Food Blog Forum inside Epcot


 Unbelievable lunch from the all the top disney chefs


Special St. Patrick's dessert bar and front row seating for the Epcot firework show


Best brunch courtesy of Whole Foods including to die for banana stuffed french toast with carmel buttered rum sauce and... Drumroll please.... The best gift a girl could come home with courtesy of Kitchen Aid:


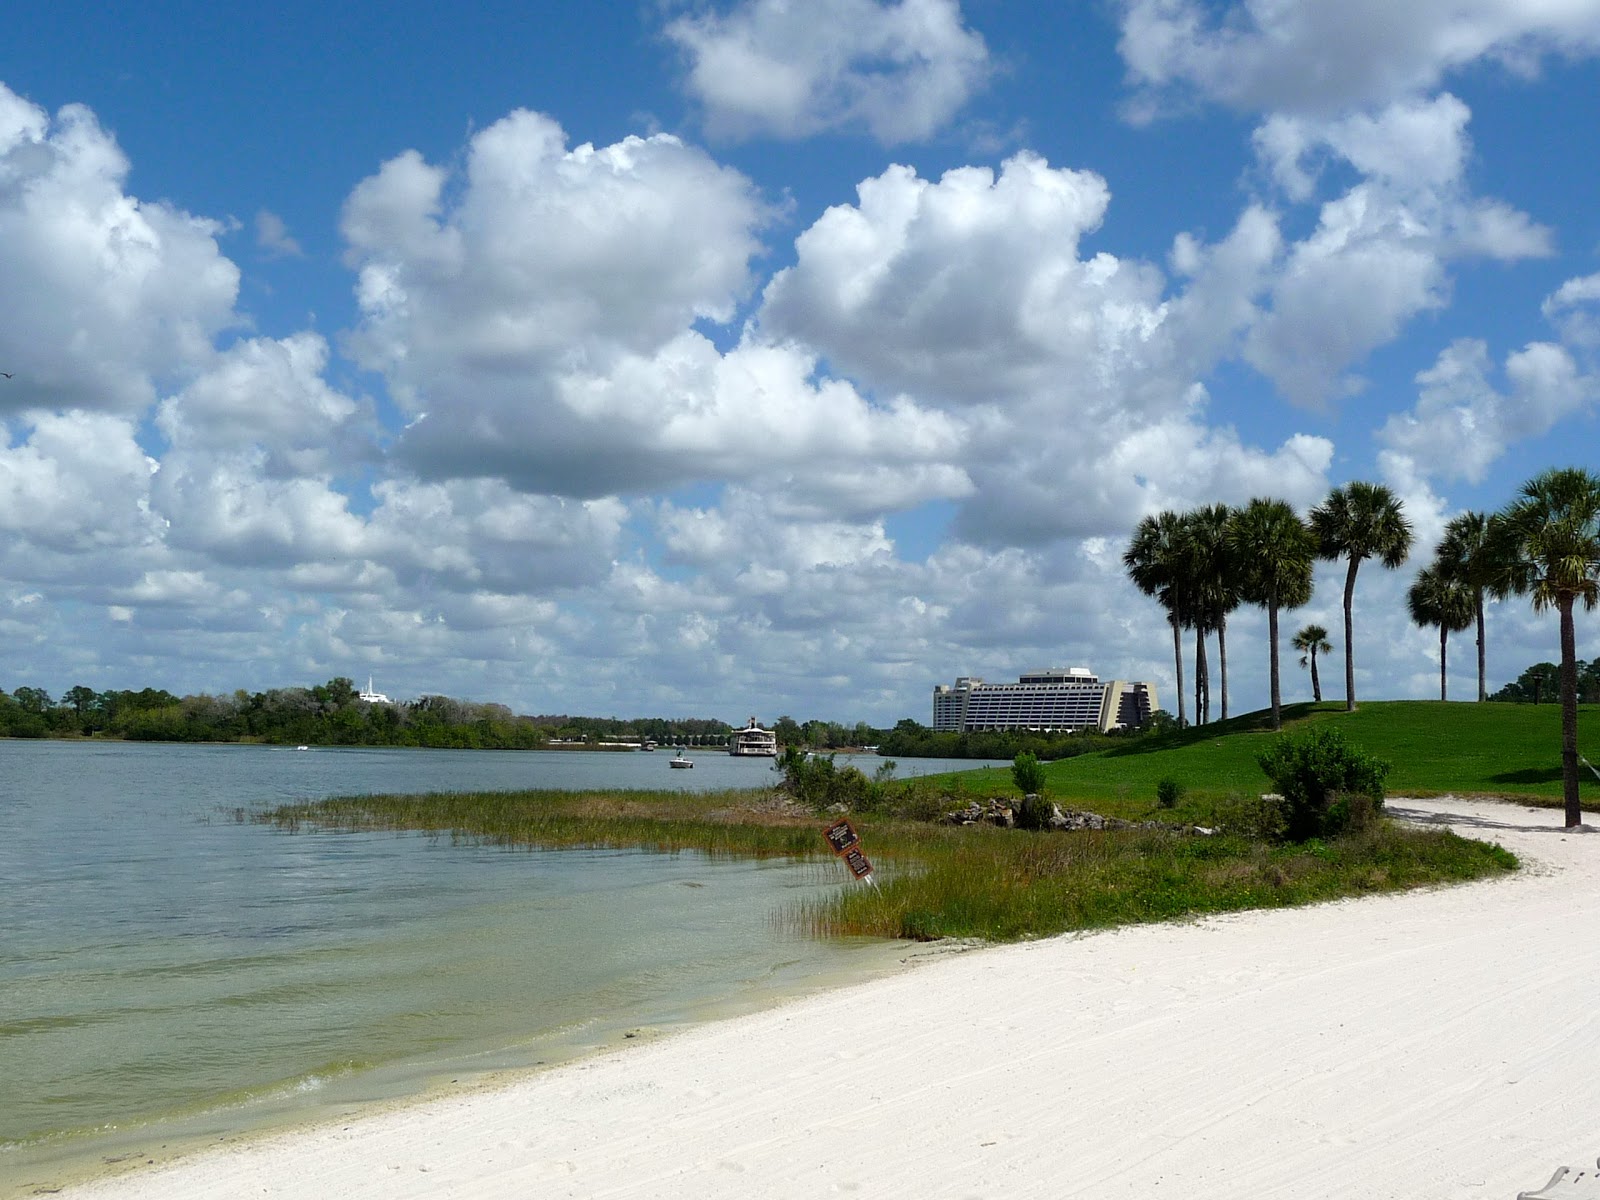
Taking in the scenery one last time before we leave and enjoying a raspberry colada with the animals:


A big thank you to Julie Deily from The Little Kitchen. Not only is she an amazing food blogger and life blogger but this girl is a serious undercover rockstar. I hope to become her lackey and learn from her by helping out with the next FBF. Scott & Jaden Hair from Steamy Kitchen, I am so glad you guys dreamed up FBF over taquila in Mexico with Diane and Todd (White on Rice Couple). Your vision in action is positively affecting so many, including myself and I am very thankful. Dawn Viola, you are awesome and I appreciate your hard work, words, and sass. I think one day we might be blogger BFFs. My point here is that Food Blog Forum Orlando 2012 was simply amazing and that I am a better person, blogger, food writer and photographer because of it. Thank you, Thank you, Thank you.

I would also be remiss if I also didn't thank all the sponsors who helped make my experience at FBF Orlando possible. Thank you to Walt Disney World for hosting us, putting us up at the beautiful Polynesian Resort which we are surely to return to soon. For the welcome receptions amazing food and ambiance at the Grand Floridian, and to the chefs of Epcot and all the disney restaurants that constantly wined and dined us. To Pam & Karen for your hard work and dedication on the Disney side, to Rachel at Kitchen Aid & Arianna with OXO, for speaking and hosting a wonderful roundtable session as well as giving away wonderful swag bags and prizes like my lovely new Artisan Stand Mixer, (!!! -Again Kitchen Aid, you rock) I am thrilled to have it in my kitchen! I will make good use of it, I promise. Sarah with Land O'Lakes, you were a delight. Thanks so much for joining us, you were a pleasure to get to know. To Whole Foods Orlando thank you for the delectable brunch, I especially enjoyed the banana and caramel stuffed french toast. To die for! To all my new blogger friends, thank you for embracing me. I was new and knew no one but left feeling extremely supported. Can't wait to see what the future holds for all of us and I hope to see you all at FBF Orlando next year :)

-Amy